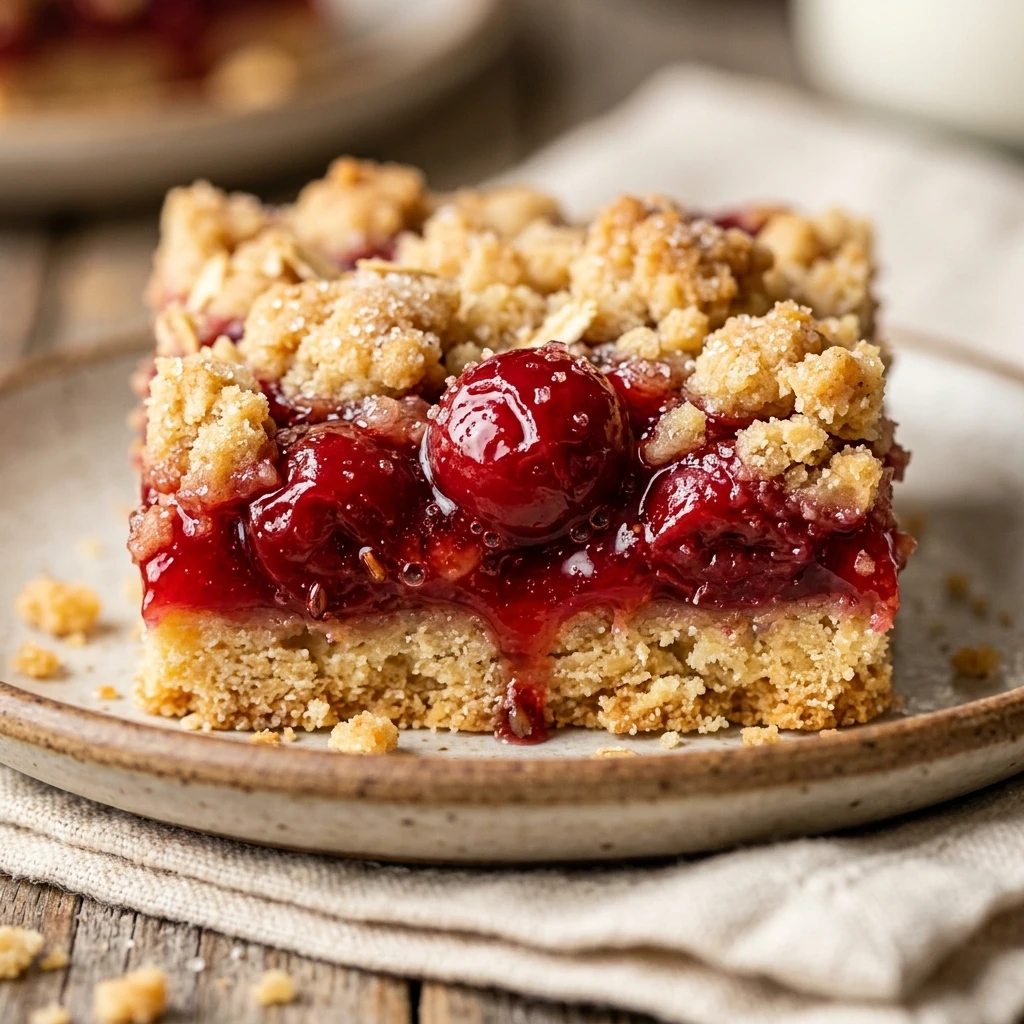

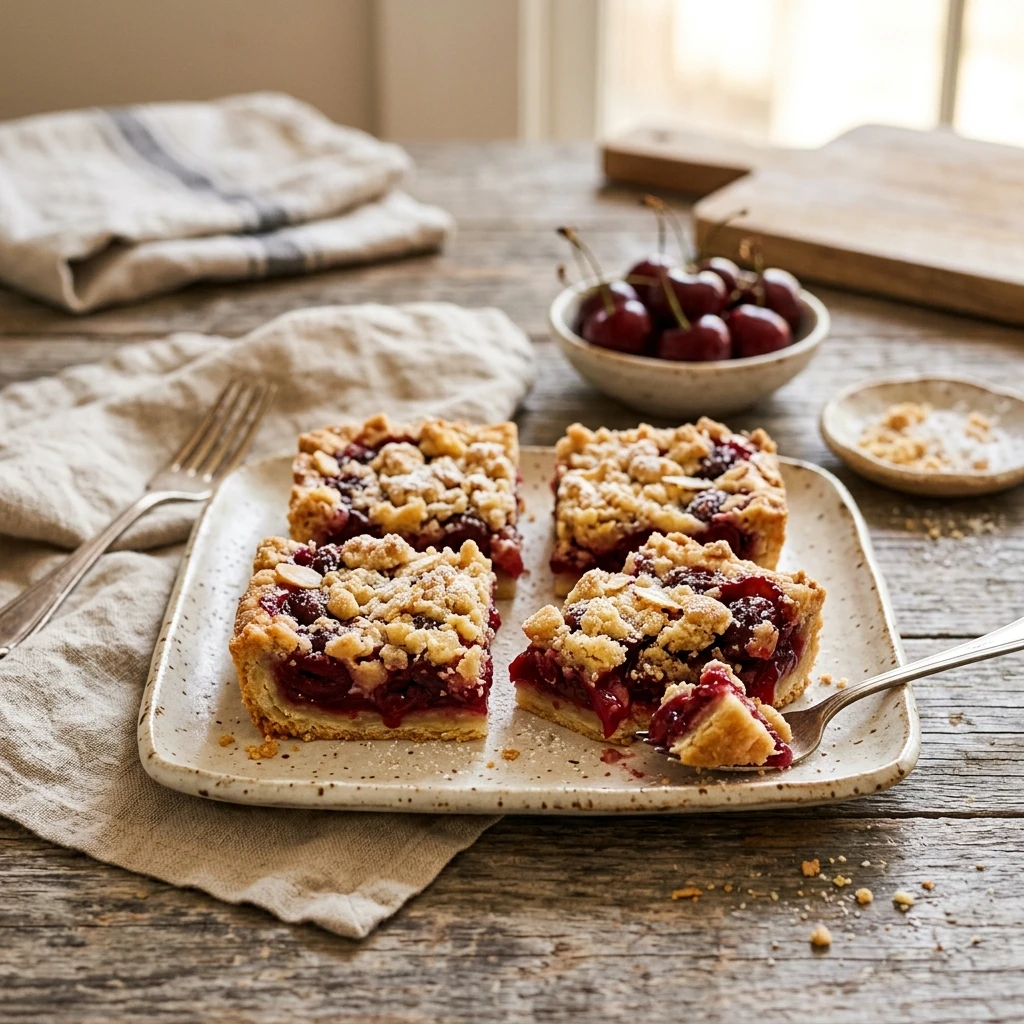
Cherry Pie Bars are the perfect solution when you crave the classic taste of a homemade pie but want something much easier to share. These bars feature a buttery, shortbread-like crust that doubles as a delicious crumbled topping. Nestled in between is a thick, sweet layer of cherry filling that creates a beautiful contrast of textures and flavors.
Whether you are hosting a summer potluck or looking for a festive holiday treat, these bars never disappoint. They are sturdy enough to be eaten by hand, making them ideal for parties and lunchboxes. Best of all, they come together much faster than a traditional pie, giving you more time to enjoy your dessert and less time crimping crusts.
Recipe Information
- Prep Time: 15 minutes
- Cook Time: 35 minutes
- Total Time: 50 minutes
- Servings: 16 bars
- Difficulty Level: Easy
Nutrition Information
- Calories per serving: 265 kcal
- Protein: 3 g
- Carbohydrates: 38 g
- Fat: 12 g
- Fiber: 1 g
- Sugar: 22 g
- Sodium: 145 mg
Why Make This Cherry Pie Bars
One of the best reasons to make these Cherry Pie Bars is their simplicity. Unlike traditional pies, there is no need to chill the dough or worry about a soggy bottom. The crust and the topping are made from the same batch of dough, which saves you both time and effort in the kitchen.
These bars are also incredibly versatile. You can serve them warm with a scoop of vanilla ice cream for a decadent dessert, or enjoy them at room temperature for a quick afternoon snack. The addition of almond extract gives the filling a professional bakery-style flavor that will have everyone asking for your secret recipe.
How to Make Cherry Pie Bars
Making these bars is a straightforward process that involves preparing a simple buttery dough, layering it with fruity filling, and baking until golden. Follow these easy steps to create a dessert that looks as good as it tastes.
Ingredients
- 1 cup unsalted butter, softened
- 1 ½ cups granulated sugar
- 3 large eggs
- 1 teaspoon vanilla extract
- ½ teaspoon almond extract
- 3 cups all-purpose flour
- ½ teaspoon salt
- 21 ounces cherry pie filling (one standard can)
- 1 cup powdered sugar (for glaze)
- 2 tablespoons milk (for glaze)
Directions
Step 1: Preparation
Preheat your oven to 350°F (175°C). Lightly grease a 9×13-inch baking pan with butter or non-stick cooking spray. You can also line it with parchment paper for easier removal.
Step 2: Creaming the Butter and Sugar
In a large mixing bowl, beat the softened butter and granulated sugar together until the mixture is light and fluffy. This usually takes about 2 to 3 minutes using an electric mixer.
Step 3: Adding Wet Ingredients
Add the eggs one at a time, beating well after each addition. Stir in the vanilla extract and almond extract until fully combined.
Step 4: Incorporating Dry Ingredients
Gradually add the flour and salt to the wet mixture. Mix on low speed until just combined. The dough will be thick and slightly sticky.
Step 5: Layering the Base
Spread about two-thirds of the dough into the bottom of your prepared baking pan. Use a spatula or dampened fingers to press it into an even layer.
Step 6: Adding the Filling
Spread the cherry pie filling evenly over the bottom crust. Ensure the cherries are distributed well so every bar gets plenty of fruit.
Step 7: Topping and Baking
Drop the remaining dough by teaspoonfuls over the top of the cherry filling. It won’t cover the cherries completely, which is fine. Bake for 30 to 35 minutes, or until the top is light golden brown.
Step 8: Glazing
Whisk together the powdered sugar and milk until smooth. Once the bars have cooled slightly, drizzle the glaze over the top in a decorative pattern.
How to Serve Cherry Pie Bars
For the cleanest slices, allow the bars to cool completely before cutting them into squares. If you prefer a warm dessert, you can serve them slightly warm, but the filling may be a bit soft. They look beautiful on a platter dusted with a little extra powdered sugar or served alongside a dollop of whipped cream.
How to Store Cherry Pie Bars
Store these bars in an airtight container at room temperature for up to two days. For longer storage, keep them in the refrigerator for up to five days. If you want to freeze them, wrap individual bars in plastic wrap and store them in a freezer-safe bag for up to three months. Thaw at room temperature before serving.
Expert Tips for Perfect Cherry Pie Bars
Make sure your butter is truly softened at room temperature so it creams properly with the sugar. If the butter is too cold, the crust may be lumpy. Also, do not overmix the dough once you add the flour, as this can lead to a tough crust. For an extra touch of flavor, try toasting some sliced almonds and sprinkling them on top of the glaze.
Delicious Variations
You can easily swap the cherry pie filling for blueberry, apple, or peach filling for a different flavor profile. If you want a more tart bar, add a teaspoon of lemon zest to the crust dough. For a chocolate twist, drizzle the finished bars with melted dark chocolate instead of the sugar glaze.
Frequently Asked Questions
Q: Can I use fresh cherries instead of canned filling?
Yes, but you will need to cook the fresh cherries down with sugar and a bit of cornstarch first to create a thickened sauce, otherwise the bars will be too watery.
Q: Do I have to use almond extract?
While almond extract complements cherries perfectly, you can omit it if you have an allergy or simply prefer a pure vanilla flavor.
Q: Why is my crust crumbling?
This can happen if the flour was packed too tightly into the measuring cup. Always fluff your flour with a spoon before leveling it off for the most accurate measurement.
Q: Can I make these gluten-free?
Yes, you can substitute the all-purpose flour with a 1:1 gluten-free baking flour blend. The texture may vary slightly but will still be delicious.
Q: Can I use a smaller pan?
If you use an 8×8 pan, the bars will be much thicker and will require a longer baking time. A 9×13 pan is recommended for the best ratio of crust to filling.
Conclusion
Cherry Pie Bars are a timeless dessert that brings the comfort of home baking to any occasion. With their buttery crust and vibrant fruit center, they are sure to become a staple in your recipe collection. Give them a try the next time you need a sweet treat that is as easy to make as it is to eat!
Cherry Pie Bars
- Cook Time: 50 minutes
- Total Time: 50 minutes
- Diet: Vegetarian
Ingredients
- 1 cup unsalted butter, softened
- 1 ½ cups granulated sugar
- 3 large eggs
- 1 teaspoon vanilla extract
- ½ teaspoon almond extract
- 3 cups all-purpose flour
- ½ teaspoon salt
- 21 ounces cherry pie filling (one standard can)
- 1 cup powdered sugar (for glaze)
- 2 tablespoons milk (for glaze)
Instructions
- Preheat your oven to 350°F (175°C). Lightly grease a 9×13-inch baking pan with butter or non-stick cooking spray. You can also line it with parchment paper for easier removal.
- In a large mixing bowl, beat the softened butter and granulated sugar together until the mixture is light and fluffy. This usually takes about 2 to 3 minutes using an electric mixer.
- Add the eggs one at a time, beating well after each addition. Stir in the vanilla extract and almond extract until fully combined.
- Gradually add the flour and salt to the wet mixture. Mix on low speed until just combined. The dough will be thick and slightly sticky.
- Spread about two-thirds of the dough into the bottom of your prepared baking pan. Use a spatula or dampened fingers to press it into an even layer.
- Spread the cherry pie filling evenly over the bottom crust. Ensure the cherries are distributed well so every bar gets plenty of fruit.
- Drop the remaining dough by teaspoonfuls over the top of the cherry filling. It won’t cover the cherries completely, which is fine. Bake for 30 to 35 minutes, or until the top is light golden brown.
- Whisk together the powdered sugar and milk until smooth. Once the bars have cooled slightly, drizzle the glaze over the top in a decorative pattern.