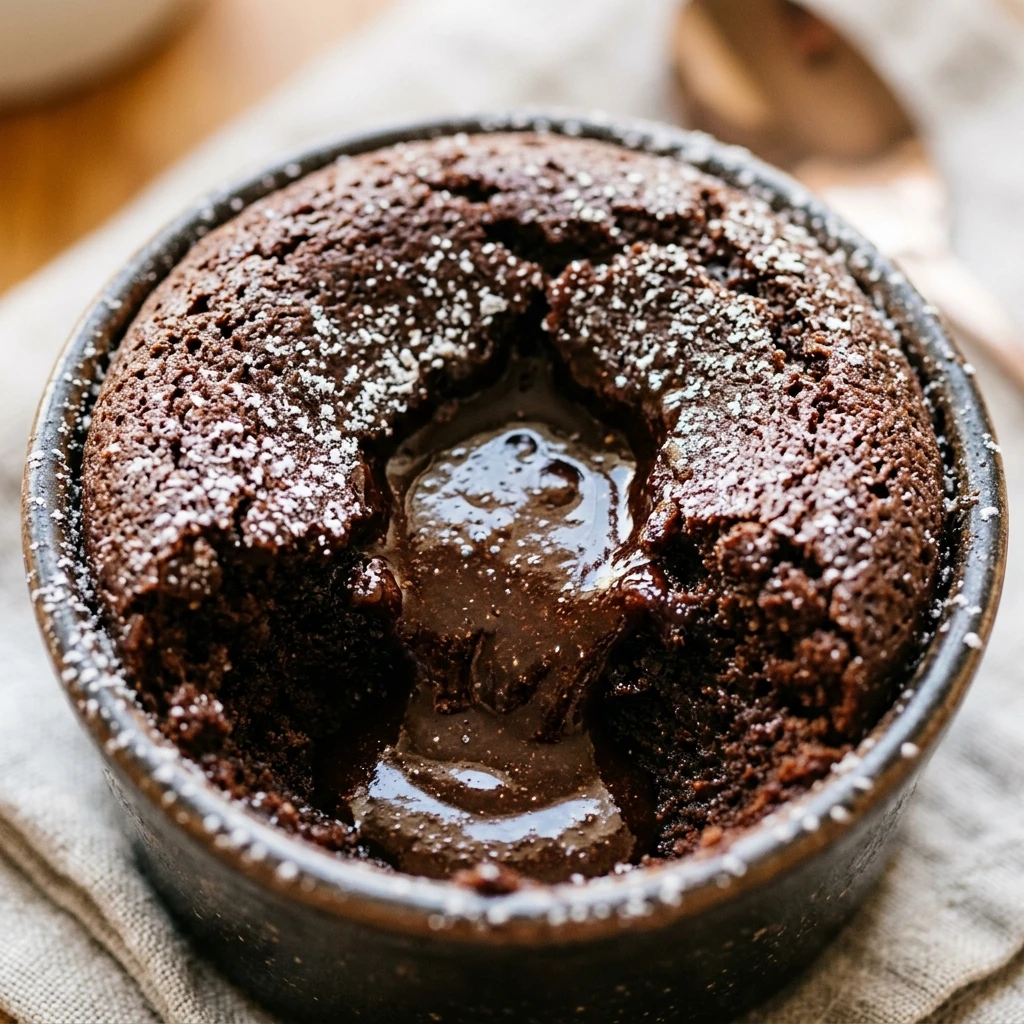

There is something truly magical about cutting into a warm cake and watching a rich, velvety chocolate center spill out. Chocolate Lava Cups, also known as molten lava cakes, are the ultimate indulgence for any chocolate lover. Despite their fancy appearance at high-end restaurants, these decadent treats are surprisingly simple to make in your own kitchen with just a few pantry staples.
Whether you are planning a romantic date night, a special holiday dinner, or simply craving a deep cocoa fix, these lava cups never fail to impress. The contrast between the firm, cake-like exterior and the liquid heart of chocolate creates a sensory experience that is hard to beat. Best of all, they come together in less than half an hour, making them a perfect last-minute dessert.
Recipe Information
- Prep Time: 10 minutes
- Cook Time: 12 minutes
- Total Time: 22 minutes
- Servings: 4
- Difficulty Level: Medium
Nutrition Information
- Calories per serving: 355 kcal
- Protein: 5g
- Carbohydrates: 32g
- Fat: 24g
- Fiber: 2g
- Sugar: 22g
- Sodium: 55mg
Why Make This Chocolate Lava Cups
You should make these Chocolate Lava Cups because they offer a professional-grade dessert experience without the professional-grade stress. They are portion-controlled in individual ramekins, ensuring everyone gets their own perfect serving. The recipe relies on high-quality chocolate rather than cocoa powder alone, resulting in a much deeper and more sophisticated flavor profile than a standard chocolate muffin.
Additionally, this recipe is incredibly reliable. Once you master the timing of your specific oven, you can whip these up anytime you have guests. They are naturally impressive and require very little decoration to look stunning on a plate. It is a foolproof way to end any meal on a high note.
How to Make Chocolate Lava Cups
Making these cups is all about the technique of underbaking the center while ensuring the edges are set enough to hold their shape. Follow these simple steps to achieve that iconic molten core.
Ingredients
- 4 oz high-quality bittersweet chocolate (60% cacao or higher), chopped
- 1/2 cup unsalted butter, cut into cubes
- 2 large eggs
- 2 large egg yolks
- 1/4 cup granulated sugar
- 1/8 teaspoon salt
- 2 tablespoons all-purpose flour
- Unsalted butter and cocoa powder for coating the ramekins
Directions
Step 1: Preparation of Oven and Ramekins
Preheat your oven to 425°F (218°C). Generously grease four 6-ounce ramekins with butter. Dust the inside of each ramekin with cocoa powder, tapping out any excess. This ensures the cakes will slide out easily after baking.
Step 2: Melting the Chocolate and Butter
In a microwave-safe bowl, combine the chopped bittersweet chocolate and the cubed butter. Microwave in 30-second intervals, stirring in between, until the mixture is completely smooth. Alternatively, you can use a double boiler on the stovetop. Let the mixture cool slightly.
Step 3: Whisking Eggs and Sugar
In a medium mixing bowl, beat the 2 whole eggs, 2 egg yolks, granulated sugar, and salt. Use a whisk or an electric mixer to beat until the mixture is thick, pale yellow, and has doubled in volume. This should take about 2-3 minutes.
Step 4: Folding and Mixing
Gently fold the melted chocolate mixture into the egg mixture using a spatula. Once combined, sift the flour over the batter and fold it in gently until no white streaks remain. Be careful not to overmix, as you want to keep the air in the eggs.
Step 5: Baking the Lava Cups
Divide the batter evenly among the four prepared ramekins. Place the ramekins on a baking sheet and bake for 12 to 14 minutes. The sides should be firm and set, but the center should still look slightly soft and jiggle when moved.
Step 6: Resting and Inverting
Let the ramekins cool for exactly 1 minute. Run a thin knife around the edges to loosen the cake. Place a small dessert plate over the top of a ramekin and carefully flip it over. Let it sit for 10 seconds, then lift the ramekin to reveal the cake.
How to Serve Chocolate Lava Cups
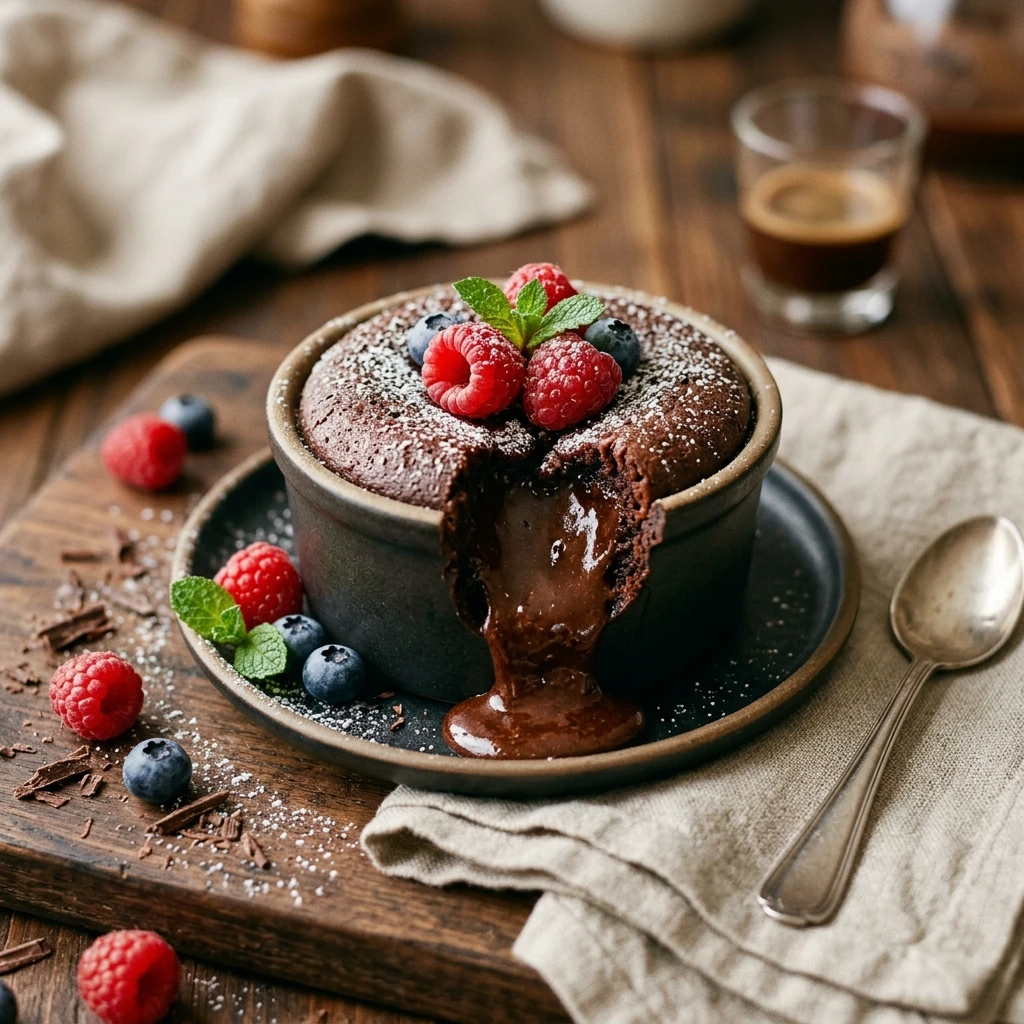
These cakes are best served immediately while the center is still warm and liquid. A simple dusting of powdered sugar adds a classic touch. For a more indulgent presentation, add a scoop of cold vanilla bean ice cream or a dollop of fresh whipped cream. The contrast between the hot cake and cold cream is exceptional. You can also garnish with fresh raspberries or a sprig of mint for a pop of color.
How to Store Chocolate Lava Cups
While best enjoyed fresh, you can store leftover baked cakes in the refrigerator for up to 2 days. To reheat, place them in the microwave for 15-20 seconds until the center softens again. You can also prepare the batter ahead of time, pour it into the ramekins, and refrigerate for up to 24 hours before baking. If baking from the fridge, you may need to add 1-2 minutes to the total bake time.
Expert Tips for Perfect Chocolate Lava Cups
First, use the best chocolate you can find; since there are so few ingredients, the quality of the chocolate defines the flavor. Second, do not skip the egg yolks; they provide the richness and stability needed for the molten center. Third, watch your oven closely. Every oven is different, so start checking at the 11-minute mark. If the top is no longer shiny and looks set, they are likely ready.
Delicious Variations
For a twist, add a teaspoon of instant espresso powder to the chocolate mixture to enhance the cocoa flavor. You can also “stuff” the center by pushing a single square of white chocolate or a teaspoon of salted caramel into the batter before baking. For a festive version, add a drop of peppermint extract or orange zest to the batter for a bright, aromatic finish.
Frequently Asked Questions
Q: Why did my lava cake turn into a regular muffin?
This usually happens if the cakes are overbaked. If the center is fully cooked through, it won’t be liquid. Try reducing your bake time by 1 or 2 minutes next time.
Q: Can I use cocoa powder instead of melted chocolate for the batter?
For this specific recipe, melted chocolate is essential for the “lava” texture. Cocoa powder alone will result in a different consistency that won’t flow as well.
Q: Can I make these without ramekins?
Yes, you can use a standard muffin tin. Grease and flour the cups well. Since muffin cups are smaller, reduce the baking time to about 8-10 minutes.
Q: Do I have to unmold them from the ramekin?
Not at all! If you are nervous about the cake breaking, you can serve them directly in the ramekins. Just be careful as the ceramic will be very hot.
Q: My cake collapsed when I flipped it. What happened?
If the cake collapses completely, it was likely underbaked and the “walls” weren’t strong enough to hold the liquid. Ensure the edges look matte and firm before removing from the oven.
Conclusion
Chocolate Lava Cups are the perfect solution for anyone looking to create a memorable dessert with minimal effort. By following the timing carefully and using quality ingredients, you can bring the luxury of a steakhouse dessert right to your dining table. Give this recipe a try for your next celebration, and enjoy the blissful moment when that first spoonful of molten chocolate flows out.
Chocolate Lava Cups
- Cook Time: 22 minutes
- Total Time: 22 minutes
- Diet: Vegetarian
Ingredients
- 4 oz high-quality bittersweet chocolate (60% cacao or higher), chopped
- 1/2 cup unsalted butter, cut into cubes
- 2 large eggs
- 2 large egg yolks
- 1/4 cup granulated sugar
- 1/8 teaspoon salt
- 2 tablespoons all-purpose flour
- Unsalted butter and cocoa powder for coating the ramekins
Instructions
- Preheat your oven to 425°F (218°C). Generously grease four 6-ounce ramekins with butter. Dust the inside of each ramekin with cocoa powder, tapping out any excess. This ensures the cakes will slide out easily after baking.
- In a microwave-safe bowl, combine the chopped bittersweet chocolate and the cubed butter. Microwave in 30-second intervals, stirring in between, until the mixture is completely smooth. Alternatively, you can use a double boiler on the stovetop. Let the mixture cool slightly.
- In a medium mixing bowl, beat the 2 whole eggs, 2 egg yolks, granulated sugar, and salt. Use a whisk or an electric mixer to beat until the mixture is thick, pale yellow, and has doubled in volume. This should take about 2-3 minutes.
- Gently fold the melted chocolate mixture into the egg mixture using a spatula. Once combined, sift the flour over the batter and fold it in gently until no white streaks remain. Be careful not to overmix, as you want to keep the air in the eggs.
- Divide the batter evenly among the four prepared ramekins. Place the ramekins on a baking sheet and bake for 12 to 14 minutes. The sides should be firm and set, but the center should still look slightly soft and jiggle when moved.
- Let the ramekins cool for exactly 1 minute. Run a thin knife around the edges to loosen the cake. Place a small dessert plate over the top of a ramekin and carefully flip it over. Let it sit for 10 seconds, then lift the ramekin to reveal the cake.